How to Calibrate Your pH Meter for Hydroponics: A Step‑by‑Step Guide to Accurate Readings
Introduction
Accurate pH measurement is the cornerstone of successful hydroponic cultivation because nutrient uptake is highly pH dependent. This guide will teach the reader how to calibrate a pH meter precisely, why each calibration step matters, and which tools streamline the process. By following the instructions, the grower will achieve reliable readings that translate into healthier plant growth and higher yields. The information presented is valuable even to those who already own a meter, as it reinforces best practices and highlights common pitfalls.
The guide is organized into clear sections, beginning with a concise list of required materials, followed by numbered calibration steps, practical tips, and a troubleshooting table. Each step includes product recommendations that have proven performance in real‑world hydroponic settings. The reader can choose to purchase the suggested tools or use comparable alternatives, ensuring flexibility and cost‑effectiveness.
What You’ll Need
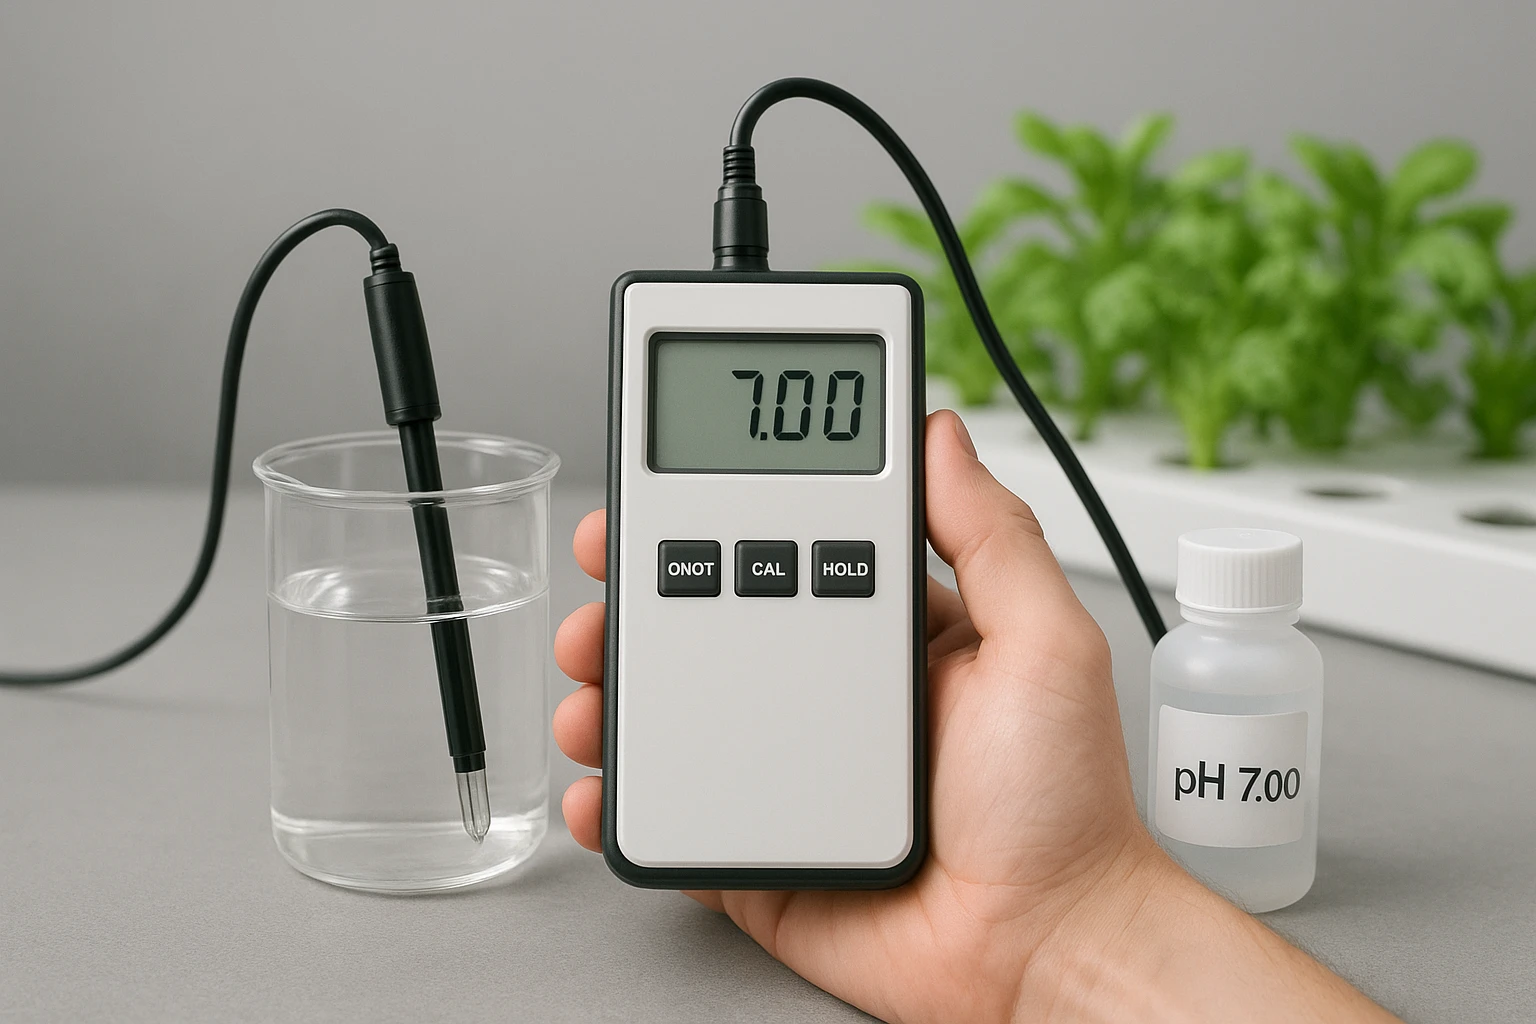
- VIVOSUN Digital pH and TDS Meter Kit – a handheld meter with pH, TDS, EC, and temperature functions.
- Apera pH Buffer & Storage Solution Kit 8oz – provides pH 4.00, 7.00, and 10.01 calibration solutions.
- Distilled or reverse‑osmosis water for rinsing the electrode.
- Soft lint‑free cloth or paper towel.
- Protective gloves and eye protection (optional but recommended).
Step 1: Prepare a Clean Workspace
Begin by selecting a well‑lit, dust‑free surface where the meter and solutions can be placed without contamination. Clear the area of unrelated chemicals, and arrange the tools in the order they will be used. This preparation reduces the risk of cross‑contamination that could skew calibration results. A tidy workspace also speeds up the process, allowing the grower to focus on precise measurements.
At this stage, the VIVOSUN Digital pH and TDS Meter Kit proves useful because its lightweight, handheld design includes a protective case that prevents accidental damage while moving between stations. The kit is priced at $15.19, carries a 4/5.0 rating from over 32,000 reviews, and offers both pH and TDS functionality, making it a versatile choice for hydroponic growers.
Step 2: Clean the Electrode
Remove the electrode from the meter and rinse it gently with distilled water to eliminate residue from previous measurements. Pat the tip dry with a lint‑free cloth, taking care not to rub the glass membrane. If the electrode appears cloudy, immerse it briefly (30‑60 seconds) in a mild cleaning solution recommended by the manufacturer, then rinse again.
Using the protective case from the VIVOSUN kit ensures that the electrode is stored safely when not in use, extending its lifespan. Regular cleaning prevents drift in pH readings, a common source of inaccuracy that can lead to nutrient imbalances.
Step 3: Prepare Calibration Buffers
Open the Apera pH Buffer & Storage Solution Kit 8oz and gently invert each bottle to mix the solution without introducing bubbles. The kit includes three buffers (pH 4.00, 7.00, and 10.01) that are traceable to NIST standards with an accuracy of ±0.01 pH at 25 °C. Each buffer is double‑sealed and has a two‑year shelf life, ensuring consistent performance over time.
Price for the 8‑oz kit is $30.00, and it holds a 4.7/5.0 rating from 237 reviews, indicating strong user satisfaction. The color‑coded caps allow quick identification, reducing the chance of using the wrong buffer during calibration.
Step 4: Perform Multi‑Point Calibration
Turn on the VIVOSUN meter and select the pH measurement mode. Immerse the electrode in the pH 7.00 buffer first, allowing the reading to stabilize for up to 30 seconds. Once the display settles within ±0.02 of the buffer value, press the calibration button to set the mid‑point.
Next, rinse the electrode with distilled water and repeat the process with the pH 4.00 buffer to set the low point, followed by the pH 10.01 buffer for the high point. Multi‑point calibration compensates for non‑linear sensor response, delivering higher accuracy across the full pH range (0‑14). The VIVOSUN meter’s ±2 % accuracy and 0.01 pH resolution make it well‑suited for this procedure.
Record each calibration value in a logbook or digital spreadsheet; this documentation helps track sensor performance over time. If the meter does not accept a calibration point, verify that the buffer is at room temperature and that the electrode is fully immersed.
Step 5: Verify Calibration with a Test Sample
After completing the calibration, test a known solution such as the pH 7.00 buffer again to confirm that the meter reads within the acceptable tolerance. Additionally, dip the electrode into a sample of the hydroponic nutrient solution and compare the reading to the expected pH range for the crop (typically 5.5‑6.5).
If the reading deviates by more than 0.05 pH, repeat the calibration steps, ensuring that the electrode is free of air bubbles and that the buffers are not expired. The VIVOSUN kit includes a temperature sensor, allowing temperature compensation to be applied automatically, which further refines accuracy.
Step 6: Document and Maintain Calibration Records
Enter the calibration date, buffer lot numbers, ambient temperature, and final readings into a calibration log. Maintaining a record enables the grower to identify trends, such as gradual sensor drift, and to schedule electrode replacement before failure occurs.
For long‑term maintenance, store the electrode in the 3‑M KCl storage solution provided in the Apera 8oz Buffer Kit or in a dedicated storage bottle from the Apera pH Buffer & Storage Solution Kit 16oz. The larger kit includes a CalPod holder that organizes the solutions and prevents accidental mixing.
Tips & Pro Tips
- Always allow the electrode to equilibrate for at least 30 seconds after immersion; premature readings are a common source of error.
- Perform calibration at the same temperature at which you will measure the nutrient solution, or use a meter with automatic temperature compensation.
- Replace calibration buffers annually, even if they appear clear, because trace contamination can accumulate over time.
- Use the General Hydroponics pH Control Kit to adjust the nutrient solution after confirming the pH reading, ensuring that the corrective chemicals are added in measured increments.
Troubleshooting
| Problem | Possible Cause | Solution |
|---|---|---|
| Reading fluctuates rapidly | Electrode not fully immersed or air bubbles present | Rinse electrode, gently tap to remove bubbles, and ensure complete submersion. |
| Calibration button does not register | Buffer temperature far from 25 °C | Allow buffer to reach room temperature or use a temperature‑controlled environment. |
| pH meter reads consistently high | Electrode aging or contamination | Clean electrode with recommended solution, store in KCl solution, or replace electrode if drift persists. |
Conclusion
Calibrating a pH meter for hydroponics is a systematic process that, when performed correctly, yields precise measurements essential for optimal nutrient uptake. By preparing a clean workspace, using high‑quality calibration buffers, and following a disciplined multi‑point calibration routine, the grower can trust the data that guides pH adjustments. Regular verification and meticulous record‑keeping further protect against sensor drift, ensuring consistent crop performance season after season.
The tools highlighted in this guide—particularly the VIVOSUN Digital pH and TDS Meter Kit, the Apera buffer kits, and the General Hydroponics pH Control Kit—provide reliable, cost‑effective solutions that complement best‑practice calibration techniques. Implement these steps today to enhance the accuracy of your hydroponic system and to achieve healthier, more productive plants.
Products Mentioned in This Guide
Frequently Asked Questions
Why is calibrating a pH meter essential for hydroponic growth?
Accurate pH ensures nutrients are available to plants, preventing deficiencies and maximizing yields.
What are the basic tools needed to calibrate a pH meter?
You need pH buffer solutions (usually 4.0 and 7.0), distilled water, a clean container, and the meter’s electrode.
How often should I calibrate my hydroponic pH meter?
Calibrate before each growing session or at least once a week for consistent accuracy.
Can I use a single‑point calibration, and when is it appropriate?
Single‑point (usually at pH 7.0) is fine for stable solutions, but dual‑point calibration is recommended for broader pH ranges.
What common mistakes cause inaccurate pH readings?
Using old buffers, not rinsing the electrode, measuring at extreme temperatures, or neglecting regular calibration can skew results.