How to Build a Hydroponic Kitchen Herb Wall for Restaurants: Step‑by‑Step Installation for Fresh, Year‑Round, Space‑Saving Herbs
Introduction
The modern restaurant kitchen demands consistent access to fresh herbs while maximizing limited space. This guide explains how to create a hydroponic herb wall that supplies basil, parsley, cilantro and other culinary staples year‑round. Readers will learn to plan, assemble, program, and maintain a wall that integrates seamlessly with existing kitchen workflows. By following these steps, one can reduce ingredient costs, improve flavor consistency, and showcase a sustainable culinary practice.
What You'll Need
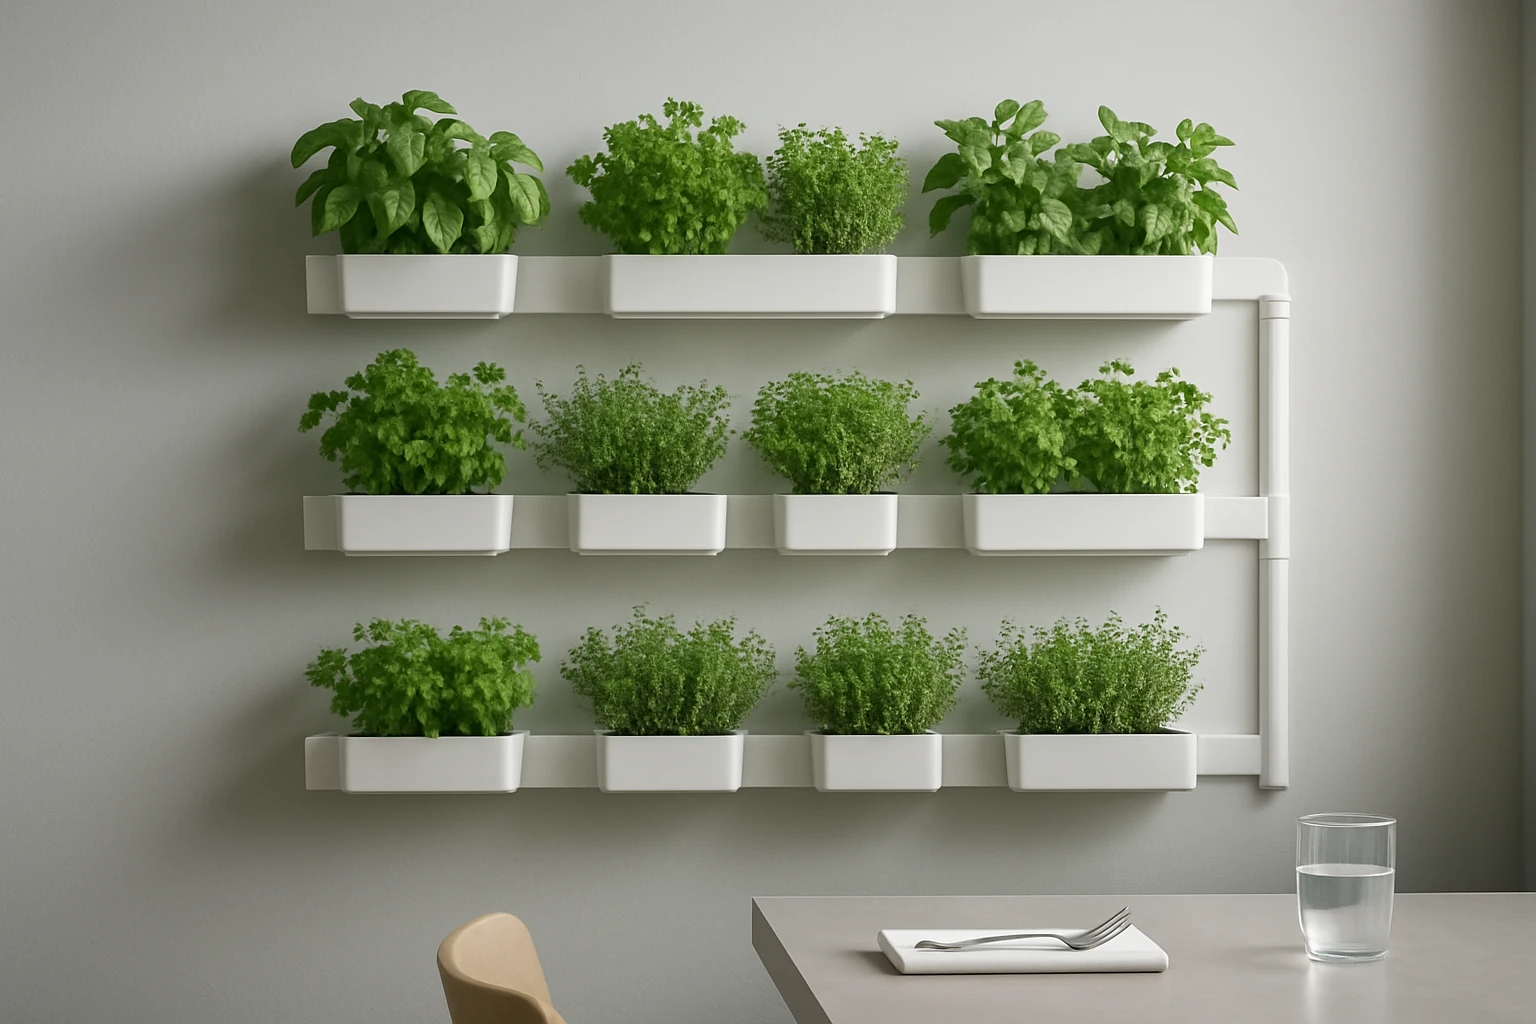
- Modular metal or PVC framing system suitable for wall mounting (minimum 6 ft wide, 4 ft high).
- Food‑grade hydroponic channels or drip trays with built‑in reservoirs.
- Submersible pump rated for 1‑2 gpm flow, with adjustable speed control.
- LED grow lights delivering full‑spectrum light, preferably with dimming and timer functions.
- pH test kit and nutrient solution formulated for leafy herbs.
- Mounting hardware, waterproof sealant, and drip tubing.
- Optional: Dryades Smart Indoor Garden for testing seedling performance before wall installation.
1. Planning the Wall Layout
The first step is to assess the kitchen wall space and determine the optimal orientation for light and water distribution. Measure the width, height, and distance from heat sources to avoid temperature fluctuations that could stress herb roots. Sketch a grid layout that allocates individual channels for each herb type, allowing for future expansion. Planning ensures that the pump can reach the furthest tray without excessive head pressure, preserving system efficiency.
2. Assembling the Frame
Construct the frame using the chosen modular system, securing vertical uprights with level brackets. Attach horizontal crossbars at 12‑inch intervals to support the hydroponic channels. Use stainless‑steel screws to prevent corrosion in a humid kitchen environment. Once the frame is rigid, apply a thin bead of waterproof sealant along all joints to prevent moisture seepage into the wall cavity.
3. Installing the Water Reservoir and Pump
Position a food‑grade reservoir at the base of the frame, ensuring it is easily accessible for refilling and cleaning. Submerge the pump and connect it to a variable‑speed controller, which allows fine‑tuning of water flow to each channel. Run drip tubing from the pump outlet to the highest channel, then cascade down using gravity to each subsequent tray. Verify that there are no leaks by running the system for ten minutes before adding plants.
4. Setting Up the Grow Lights
Mount the LED grow lights on adjustable brackets above each row of channels, maintaining a 12‑inch clearance from the foliage. Choose lights that provide a balanced red‑blue spectrum, which promotes photosynthesis and leaf growth in herbs. The Dryades Smart Indoor Garden demonstrates the effectiveness of a 17‑watt full‑spectrum LED, making it a useful reference when selecting commercial fixtures. Program the lights to operate on an 16‑hour photoperiod during peak kitchen hours, and dim them to 8‑hour cycles during off‑peak times to conserve energy.
5. Planting Herbs
Prepare net pots or rock‑wool cubes with a pre‑soak in nutrient solution for 15 minutes. Insert seedlings of basil, thyme, mint, and other desired herbs into the net pots, then place them into the hydroponic channels. Ensure spacing of at least 6 inches to allow air circulation and prevent shading. After planting, gently start the pump at low flow to avoid dislodging delicate roots.
6. Programming the System
Use a digital timer to synchronize pump operation with the lighting schedule, typically running the pump continuously for 5‑minute intervals every hour. Set the pH controller to maintain a range of 5.8‑6.2, which is optimal for most culinary herbs. Record nutrient concentration weekly, adjusting the solution to 800‑1000 ppm EC for vigorous growth. Document all settings in a logbook to track performance trends over time.
7. Maintaining the Herb Wall
Inspect the system daily for clogged emitters, water level fluctuations, and signs of nutrient deficiency. Replace any worn tubing and clean the reservoir weekly to prevent algae buildup. Prune herbs regularly to encourage bushier growth and to harvest fresh leaves for kitchen use. Rotate crops seasonally by swapping out slower‑growing varieties for faster‑turnover herbs, keeping the wall productive year‑round.
Tips & Pro Tips
- Install a small hygrometer near the wall to monitor ambient humidity, which influences transpiration rates.
- Use reflective Mylar sheets on the back of the frame to maximize light utilization and reduce energy consumption.
- Integrate a drip‑stop valve on each channel to isolate sections for independent nutrient adjustments.
- Consider employing the Dryades Smart Indoor Garden as a starter unit for rare herbs that require more controlled conditions before scaling up to the wall.
Troubleshooting
Problem: Yellowing leaves despite adequate lighting.
Solution: Check pH levels; a drift above 6.5 can cause nutrient lockout, leading to chlorosis.
Problem: Water pooling at the bottom of channels.
Solution: Adjust the pump speed or reposition the drain line to ensure proper runoff.
Problem: Fungal growth on leaf surfaces.
Solution: Increase air circulation with a low‑speed kitchen exhaust fan and reduce humidity to below 60 %.
Conclusion
By following this systematic approach, a restaurant can transform an underutilized wall into a thriving hydroponic herb garden. The result is a reliable supply of fresh, aromatic herbs that enhance dish quality and reduce purchasing costs. Continuous monitoring and periodic adjustments will keep the system efficient and resilient. One is encouraged to experiment with new varieties, thereby expanding the culinary repertoire while demonstrating a commitment to sustainability.
Products Mentioned in This Guide
Frequently Asked Questions
What size frame is ideal for a restaurant hydroponic herb wall?
A minimum of 6 ft wide by 4 ft high provides enough surface for multiple herb varieties while fitting typical kitchen walls.
Which pump flow rate works best for a kitchen herb wall?
Use a submersible pump rated 1‑2 gpm with adjustable speed to ensure steady nutrient delivery without over‑watering.
Do I need special lighting for indoor herb growth?
Yes, install full‑spectrum LED grow lights with dimming and timer functions to mimic natural sunlight and control growth cycles.
How often should I test and adjust the pH of the nutrient solution?
Check pH daily and keep it between 5.5 and 6.5; adjust with the test kit to maintain optimal herb health.
Can the hydroponic herb wall reduce ingredient costs for a restaurant?
Absolutely; growing herbs in‑house cuts purchase expenses, ensures year‑round freshness, and enhances flavor consistency.