How to Control Humidity in Hydroponic Systems for Indoor Herbs: Step‑by‑Step Guide to Optimal Growth and Mold Prevention
Introduction
Indoor hydroponic herb cultivation offers year‑round freshness, yet it demands precise environmental control. One of the most critical variables is humidity, which influences nutrient uptake, transpiration rates, and the risk of fungal disease. This guide will explain how to monitor, adjust, and maintain ideal humidity levels while preventing mold formation. By following the procedures, growers will achieve vigorous herb growth and consistent flavor profiles.
What You'll Need
- A reliable humidity and temperature controller such as the Pymeter Humidity Controller.
- A smart Wi‑Fi enabled controller like the Briidea Smart WiFi Humidity Controller for remote monitoring.
- Boveda 62% humidity control packs for localized moisture regulation.
- Digital hygrometer (optional) for cross‑checking sensor accuracy.
- Sealed storage containers for Boveda packs.
- Basic tools: screwdriver, zip ties, and mounting tape.
Step 1: Establish a Baseline Humidity Reading
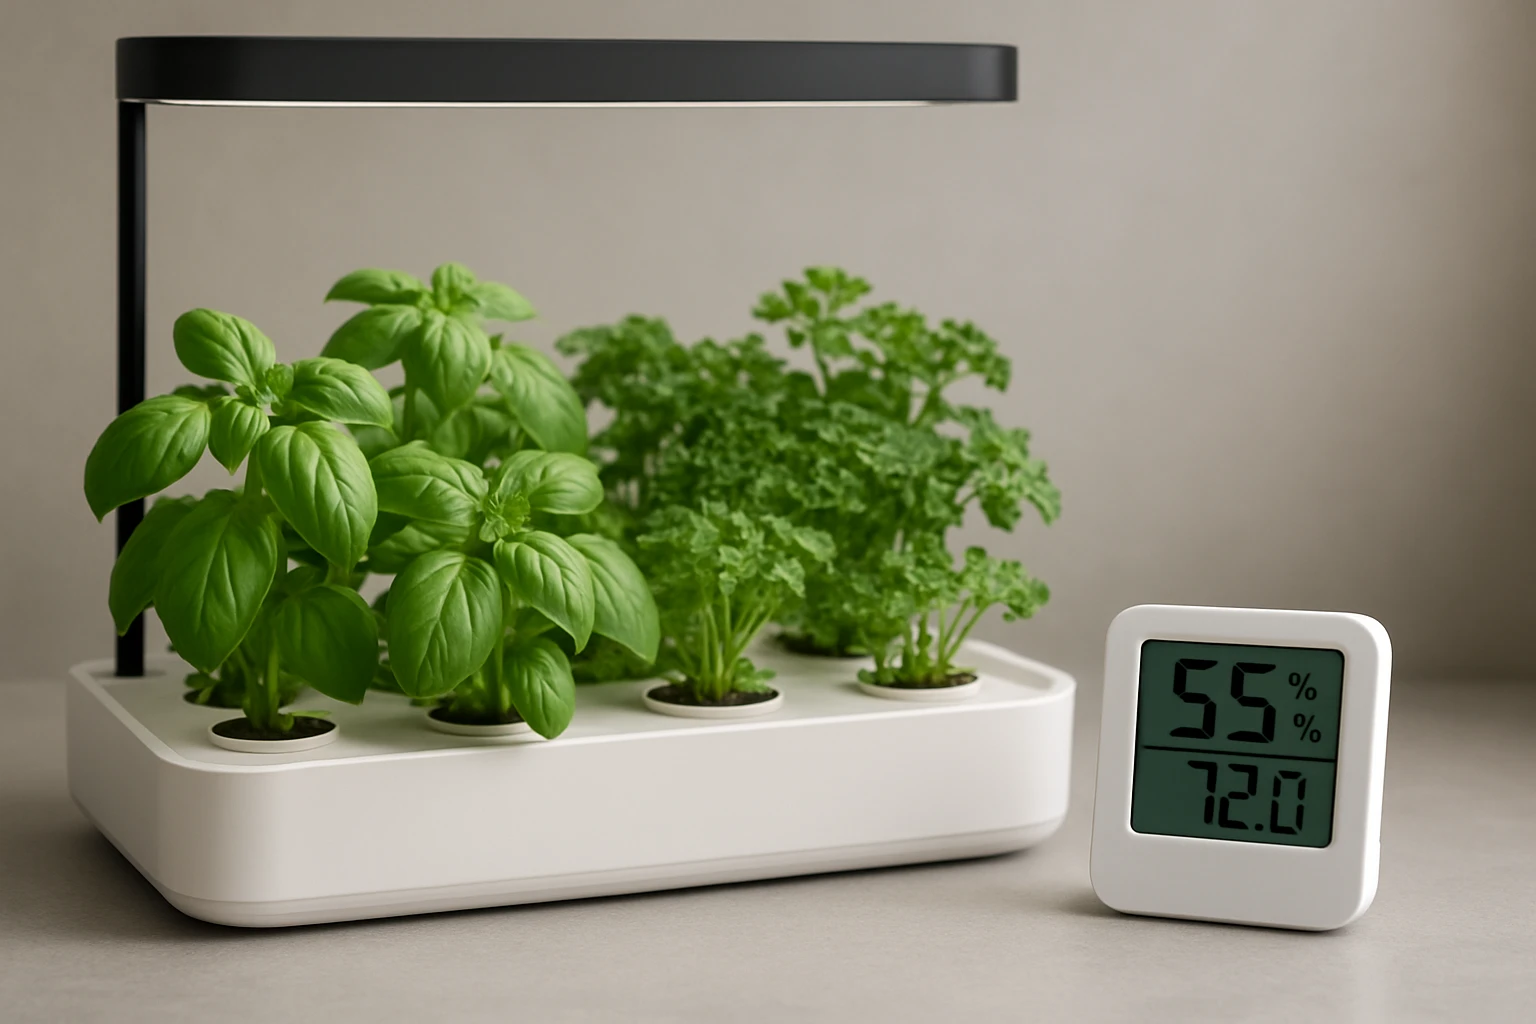
Before installing any equipment, it is essential to determine the current humidity level within the grow area. Place a calibrated digital hygrometer at plant canopy height and record the reading for at least 24 hours. Observe fluctuations during daytime lighting cycles and nighttime darkness to understand natural patterns. This baseline will guide the target humidity range, typically between 50 % and 70 % for most culinary herbs.
Step 2: Install a Primary Humidity Controller
The first major hardware component is a dedicated controller that can drive both humidifiers and dehumidifiers. The Pymeter Humidity Controller offers a built‑in humidistat, dual relay outputs, and a clear LCD display. Priced at $39.99 and rated 4.5 out of 5 stars by 28 reviewers, it provides reliable temperature and humidity regulation for mushroom greenhouses, which translates well to hydroponic herb tents.
Why this device is suitable for the step: it allows precise set‑points, automatically activates a humidifier when humidity falls below the threshold, and triggers a dehumidifier when it exceeds the upper limit. The dual‑relay design permits separate control of a small ultrasonic humidifier and a compact desiccant dehumidifier, ensuring balanced moisture without manual intervention.
Installation procedure:
- Mount the controller on the interior wall of the grow tent using the supplied brackets.
- Connect the power cord to a grounded outlet and verify that the LCD displays ambient temperature and humidity.
- Wire the humidifier to Relay 1 and the dehumidifier to Relay 2 following the wiring diagram in the user manual.
- Set the desired humidity range (e.g., 55 %–65 %) using the navigation buttons.
After configuration, the controller will maintain the set range automatically, reducing the need for constant manual adjustments.
Step 3: Add Remote Monitoring and Scheduling
While the Pymeter controller handles local regulation, remote access enhances flexibility, especially for growers who travel or work outside the grow area. The Briidea Smart WiFi Humidity Controller integrates Wi‑Fi connectivity, a mobile app, and a timer outlet. It costs $54.99 and holds a 4.4‑star rating from four reviewers, offering high‑accuracy sensors (±0.4 °C / ±3 % RH) and dual‑band Wi‑Fi support.
Why this product is valuable for this step: the app permits real‑time humidity visualization, alarm notifications when values drift outside the safe range, and the ability to adjust set‑points remotely. Additionally, the built‑in timer can schedule supplemental lighting or ventilation cycles that indirectly affect humidity.
To integrate the Briidea unit:
- Place the device near the primary controller but on a separate power strip to avoid overload.
- Connect the outlet that powers the humidifier to the Briidea’s controlled socket.
- Download the companion app, create an account, and follow the on‑screen Wi‑Fi pairing instructions.
- Configure the same humidity range as the Pymeter unit to ensure consistent operation.
With both controllers synchronized, the grower gains redundancy and the convenience of adjusting conditions from a smartphone.
Step 4: Employ Boveda Packs for Localized Micro‑Environment Control
Even with room‑wide regulation, micro‑climates can develop around dense foliage or within storage containers for cut herbs. Boveda 62 % humidity control packs provide a two‑way moisture exchange that stabilizes relative humidity inside sealed containers. A pack costs $14.99 for a 10‑pack set and enjoys a 4.7‑star rating from 16,729 reviewers, indicating strong consumer confidence.
Why these packs are appropriate: they release moisture when the internal environment becomes dry and absorb excess moisture when it becomes too humid, maintaining a constant 62 % RH. This is ideal for preserving harvested herbs, seed packets, or germination trays that require a narrowly defined moisture level.
Application steps:
- Place one or two Boveda packs into a small airtight container that holds harvested basil or thyme.
- Seal the container and store it in a cool, dark location away from direct airflow.
- Check the packs monthly; replace them when they become hard and crunchy, typically after three months.
Using Boveda packs alongside the primary controllers ensures that both the growing environment and post‑harvest storage remain optimally humid, reducing wilting and mold.
Step 5: Optimize Air Circulation and Ventilation
Air movement distributes moisture evenly and prevents stagnant pockets where mold can thrive. Install an oscillating fan at canopy level to create gentle turbulence without damaging delicate leaves. Position a small exhaust vent near the top of the grow tent to allow warm, humid air to escape, especially during the light cycle when transpiration peaks.
Combine fan speed adjustments with the humidity controllers: when the fan runs at higher speed, the Pymeter unit may need to increase humidifier output slightly to maintain the set range. Monitoring the system for a few days will reveal the optimal balance.
Tips & Pro Tips
- Calibrate all sensors at least once per month using a known‑reference hygrometer.
- Maintain a 10‑minute buffer between humidifier activation and dehumidifier shutdown to avoid rapid cycling.
- When using Boveda packs, avoid mixing different relative humidity percentages in the same container, as this can compromise effectiveness.
- Consider adding a carbon filter to the exhaust vent to reduce odor buildup while preserving humidity control.
- Document daily humidity readings in a logbook or spreadsheet to identify trends and adjust set‑points seasonally.
Troubleshooting
| Problem | Possible Cause | Solution |
|---|---|---|
| Humidity consistently above target | Dehumidifier undersized or relay not activating | Verify dehumidifier power, check relay connection on the Pymeter controller, and consider a larger capacity unit. |
| Humidity drops rapidly after humidifier cycles | Excessive ventilation or fan speed | Reduce fan speed or close vent slightly during humidifier operation. |
| Mold appears on leaf undersides | Localized high humidity or poor air circulation | Increase fan airflow, ensure Boveda packs are not placed directly on foliage, and lower overall humidity set‑point by 5 %. |
Conclusion
Effective humidity management is the cornerstone of successful indoor hydroponic herb production. By establishing a baseline, installing both a dedicated controller and a smart Wi‑Fi unit, employing Boveda packs for micro‑environment stability, and optimizing air circulation, growers can achieve consistent growth while minimizing mold risk. The outlined steps provide a practical framework that can be adapted to any indoor garden size, ensuring that herbs remain flavorful, aromatic, and ready for culinary use.
Products Mentioned in This Guide
Frequently Asked Questions
What is the ideal humidity range for indoor hydroponic herbs?
Most herbs thrive at 40‑60% relative humidity, with basil and mint preferring the higher end of that range.
How often should I calibrate my hygrometer or humidity controller?
Calibrate at least once a month or whenever readings seem inconsistent, using a known reference like a Boveda pack.
Can I use Boveda packs instead of an electronic controller?
Boveda packs work for small, localized zones but cannot regulate whole‑room humidity like an electronic controller.
What signs indicate excess humidity and potential mold growth?
Visible fungal spots, a sour smell, and wet leaf edges suggest humidity is too high and ventilation is needed.
How does a Wi‑Fi humidity controller improve herb health?
It provides real‑time monitoring and remote adjustments, keeping humidity within target ranges even when you’re away.