DIY Microbial Testing for Home Hydroponics: A Complete Step‑by‑Step Guide
Introduction
Maintaining a healthy microbial environment is as essential as regulating pH in a hydroponic system. This guide explains why microbial balance matters, how to monitor it, and which tools simplify the process. Readers will learn to identify common pathogens, perform accurate tests, and apply corrective actions without professional laboratory services. By the end of the article, one will be able to protect yields, improve nutrient uptake, and extend the lifespan of the growing system.
Background and Context
Hydroponics relies on a closed nutrient solution that supports plant roots directly, eliminating soil‑borne microbes but encouraging water‑borne organisms. Beneficial microbes such as nitrogen‑fixing bacteria and mycorrhizal fungi can enhance nutrient availability, whereas harmful microbes like Pythium, Fusarium, and algae compete with plants for resources. The balance of these microorganisms is influenced by temperature, dissolved oxygen, nutrient concentration, and pH. Understanding these dynamics provides the foundation for effective testing and management.
Key Concepts in Microbial Testing
Microbial testing in hydroponics focuses on three primary objectives: detection of pathogens, quantification of total viable counts, and assessment of beneficial populations. The most common methods include:
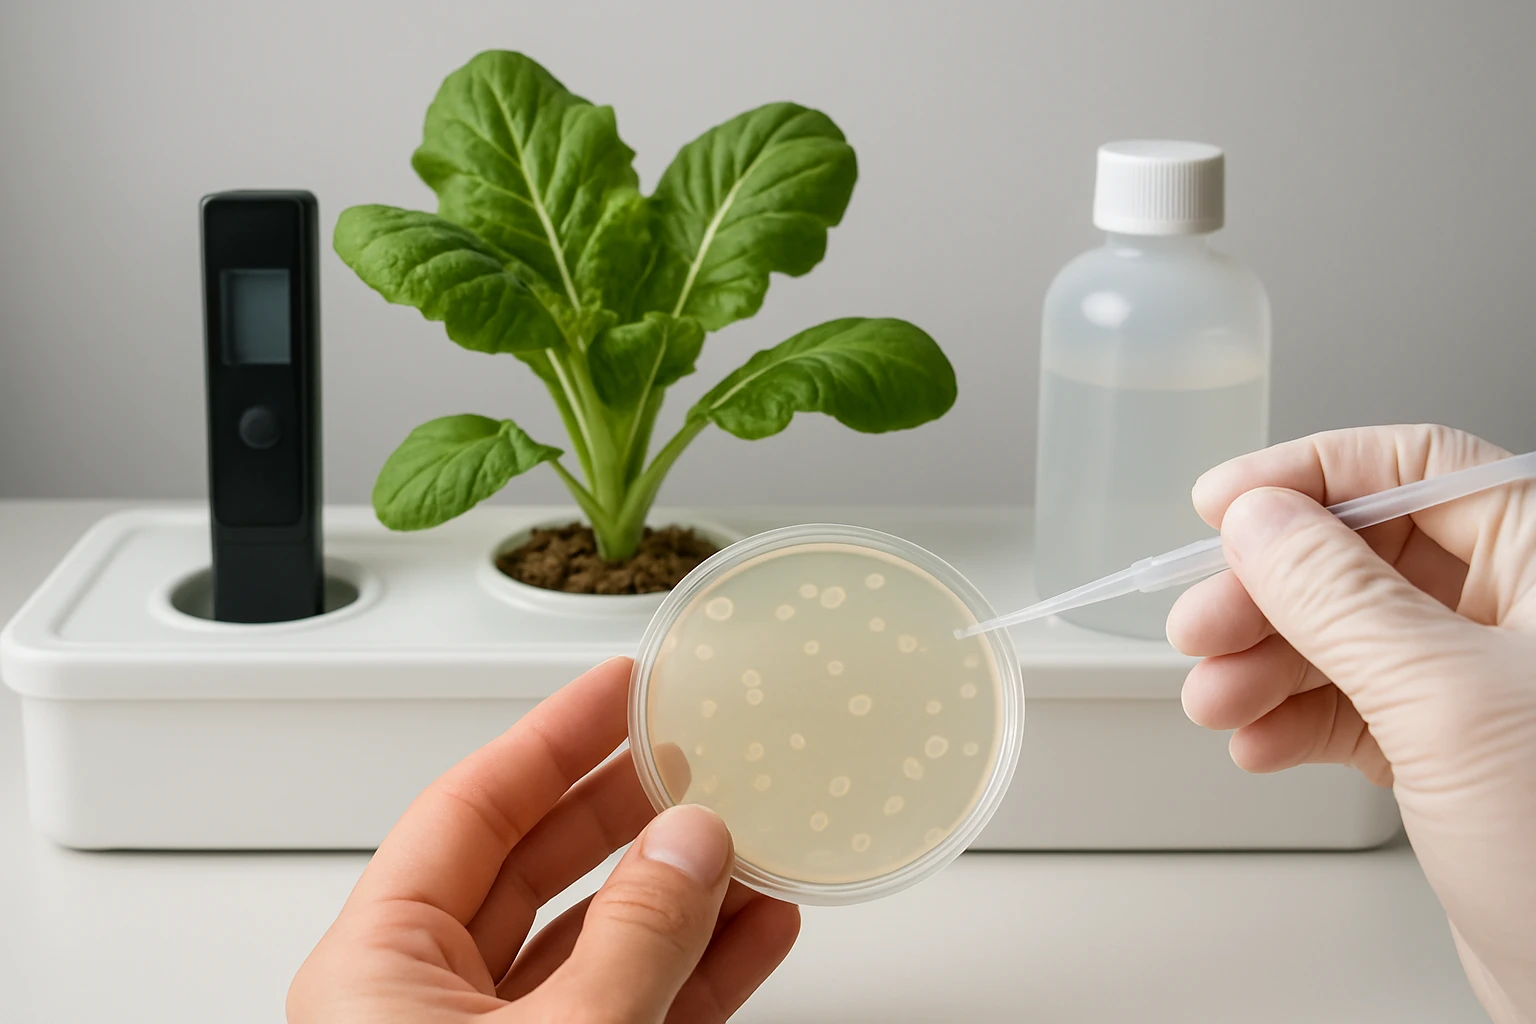
- Culture‑based plate counts: Samples are spread on selective agar media, incubated, and colonies are counted to estimate colony‑forming units (CFU) per milliliter.
- Rapid test kits: Colorimetric strips or liquid reagents change hue in the presence of specific enzymes produced by pathogens.
- Molecular assays: Polymerase chain reaction (PCR) detects DNA signatures of target microbes, offering high specificity but requiring specialized equipment.
For most home growers, culture‑based plate counts and rapid test kits provide a practical balance of cost, accuracy, and ease of use. The following sections detail how to implement these methods effectively.
Recommended Product: General Hydroponics pH Control Kit
Accurate pH measurement is a prerequisite for reliable microbial testing because pH influences microbial growth rates. The General Hydroponics pH Control Kit offers a complete solution for monitoring and adjusting solution pH.
- Price: $22.88
- Rating: 4.7/5.0 based on 28,681 reviews
- Availability: In Stock
- Key features: includes 8 oz. pH Up, 8 oz. pH Down, 1 oz. test indicator, test tube, eyedropper, and pH level chart
- Ideal pH range for most crops: 5.5 – 6.5
The kit delivers fast, reliable color changes that are easy to read, making it suitable for both beginners and seasoned growers. Maintaining the recommended pH range reduces the risk of pathogen proliferation and supports beneficial microbial activity.
Step‑by‑Step Procedure for Microbial Testing
1. Sample Collection
Collect a 100 ml sample of nutrient solution from a representative point in the system, preferably after the water has circulated for at least 30 minutes. Use a sterilized container to avoid contaminating the sample with external microbes. Label the container with the date, time, and location of collection. Store the sample at 4 °C if testing will be delayed beyond two hours.
2. Preparing Culture Media
For general bacterial counts, prepare a standard nutrient agar plate according to the manufacturer’s instructions. For fungal pathogens, use potato dextrose agar (PDA) supplemented with antibiotics to suppress bacterial growth. Autoclave the media at 121 °C for 15 minutes, then pour into sterile Petri dishes and allow to solidify.
3. Serial Dilution
Perform a ten‑fold serial dilution to obtain countable colony numbers. Transfer 1 ml of the sample into 9 ml of sterile distilled water (dilution 10⁻¹), mix thoroughly, and repeat the process up to 10⁻⁵ as needed. Use a new sterile pipette tip for each dilution to maintain accuracy.
4. Plating
Using a calibrated pipette, dispense 0.1 ml of each dilution onto the surface of the appropriate agar plate. Spread the liquid evenly with a sterile spreader. Invert the plates and incubate at 25 °C for 48 hours for bacterial counts, and at 28 °C for 72 hours for fungal counts.
5. Colony Counting and Interpretation
After incubation, count colonies on plates that contain between 30 and 300 colonies, as this range provides statistical reliability. Calculate CFU/ml using the formula: CFU/ml = (Number of colonies × Dilution factor) / Volume plated. Compare the results with threshold values: bacterial counts above 10⁵ CFU/ml often indicate contamination, while fungal counts above 10³ CFU/ml suggest a pathogenic presence.
6. Adjusting pH and Nutrient Balance
If the pH falls outside the 5.5 – 6.5 range, use the General Hydroponics pH Control Kit to bring the solution back to the optimal window. Add the recommended number of drops of pH Up or pH Down, retest after 5 minutes, and repeat until the desired pH is achieved. Maintaining proper pH reduces the likelihood of pathogen proliferation.
Comparison and Selection Guide
When choosing a microbial testing approach, consider cost, accuracy, turnaround time, and required expertise. The table below summarizes the main options for home growers.
| Method | Cost per Test | Accuracy | Time Required | Skill Level |
|---|---|---|---|---|
| Culture‑Based Plate Count | $0.50 – $1.00 (media & disposables) | High for total viable counts | 2 – 3 days (incubation) | Intermediate |
| Rapid Colorimetric Kit | $5 – $10 per kit | Moderate (specific pathogens) | 15 – 30 minutes | Beginner |
| PCR (Molecular) | $15 – $30 per sample | Very high (species‑level) | 1 – 2 hours | Advanced |
For most home hydroponic setups, a combination of culture‑based counts for overall health and a rapid kit for specific pathogens offers the best balance of cost and information. The General Hydroponics pH Control Kit complements any testing regimen by ensuring the solution remains within the optimal pH range.
Best Practices & Tips
- Sanitize all equipment: Use 70 % isopropyl alcohol or a bleach solution to clean tools before each sampling session.
- Maintain consistent sampling points: Regularly collect samples from the same location to track trends accurately.
- Document results: Keep a logbook or digital spreadsheet noting date, pH, temperature, CFU counts, and any corrective actions taken.
- Control temperature: Keep the nutrient reservoir between 18 °C and 22 °C to discourage rapid fungal growth.
- Use beneficial inoculants: Introducing products containing Bacillus spp. or Trichoderma can outcompete harmful microbes.
- Regularly replace water: Changing 20 % of the solution weekly reduces the buildup of microbial debris.
Frequently Asked Questions
- How often should I test for microbes? For new systems, weekly testing for the first month is advisable; thereafter, bi‑weekly testing maintains a healthy baseline.
- Can I use the same test kit for both pH and microbial detection? No; the General Hydroponics pH Control Kit is designed solely for pH measurement. Separate microbial test kits are required for pathogen detection.
- What temperature range inhibits most pathogens? Most hydroponic pathogens thrive above 24 °C; maintaining the reservoir below this threshold reduces risk.
- Is it necessary to sterilize the nutrient solution? Complete sterilization is unnecessary and can eliminate beneficial microbes; instead, aim for a balanced microbial community.
- How do I interpret a high bacterial count but low fungal count? A high bacterial count often reflects a healthy bacterial population; however, if the count exceeds 10⁶ CFU/ml, investigate nutrient imbalances or excess organic debris.
- Can I reuse agar plates? No; reusing plates can lead to cross‑contamination and inaccurate results.
- What is the role of dissolved oxygen in microbial control? Adequate dissolved oxygen (≥6 mg/L) suppresses anaerobic pathogens such as Pythium while supporting aerobic beneficial bacteria.
Conclusion
Effective microbial testing empowers home hydroponic growers to detect problems early, maintain optimal pH, and foster beneficial microbial communities. By following the step‑by‑step protocol, employing reliable tools such as the General Hydroponics pH Control Kit, and adhering to best‑practice guidelines, one can safeguard plant health and achieve consistent yields. Continuous monitoring, proper sanitation, and informed adjustments form the cornerstone of a resilient hydroponic operation.
Products Featured in This Guide
General Hydroponics pH Control Kit
Price: $22.88
Rating: 4.7/5.0 (28,681 reviews)
Why featured: Provides accurate, fast, and affordable pH measurement, a critical prerequisite for reliable microbial testing and overall plant health.
Frequently Asked Questions
Why is microbial testing as important as pH monitoring in hydroponics?
Microbial balance affects nutrient availability and disease risk, while pH controls nutrient solubility; both are needed for optimal plant health.
Which common pathogens should home growers watch for in hydroponic systems?
Key pathogens include Pythium, Fusarium, and algae, which can outcompete roots and cause root rot.
What simple tools can be used for DIY microbial testing at home?
Test kits with agar plates, handheld microscopes, and colorimetric water‑quality strips allow quick detection of bacteria and fungi.
How do temperature and dissolved oxygen influence microbial populations?
Higher temperatures and low dissolved oxygen favor harmful microbes, while cooler, well‑oxygenated water supports beneficial bacteria.
What corrective actions can be taken if a pathogen is detected?
Adjust nutrient solution temperature, increase aeration, add biological controls like beneficial bacteria, and, if needed, briefly sterilize the system with hydrogen peroxide or UV.