Introduction
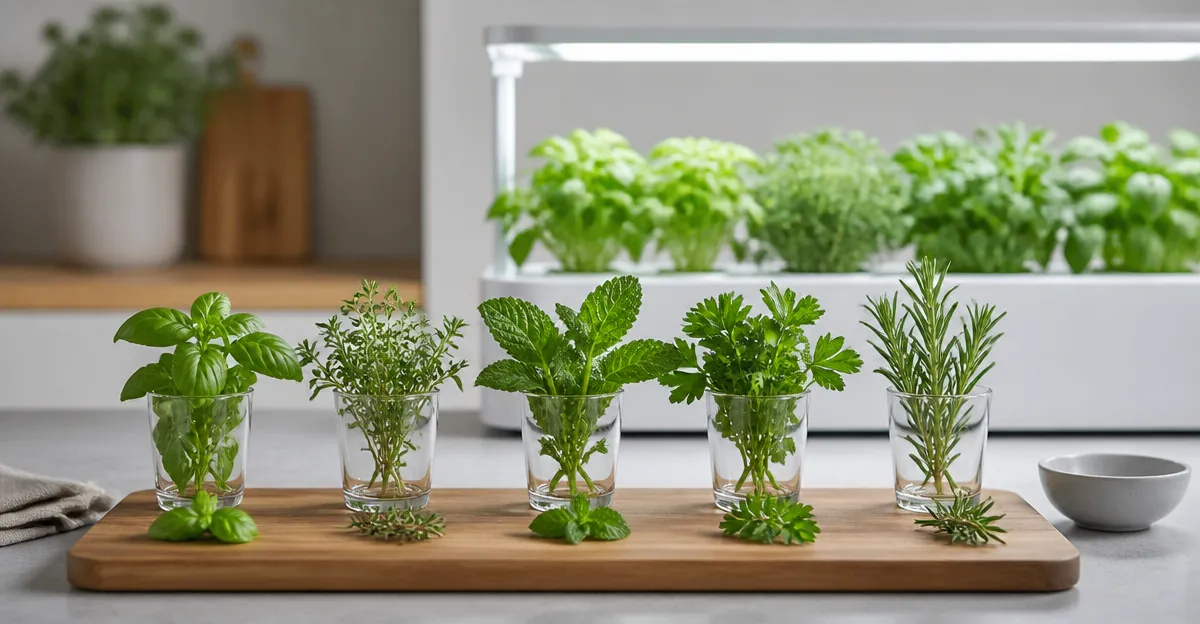
This guide teaches the reader how to assemble a hydroponic herb tasting flight—a curated collection of fresh herbs grown indoors for culinary exploration. By following the steps, one will understand system selection, lighting, planting, and harvest techniques that produce aromatic herbs faster than traditional soil methods. The result is a ready‑to‑taste flight of basil, mint, cilantro, and more, available year‑round.
What You’ll Need
- Hydroponic grow system (see product recommendations below)
- Seed‑starting media such as sponge plugs or coconut coir
- High‑quality herb seeds (basil, mint, parsley, cilantro, thyme)
- Hydroponic nutrient solution
- pH testing kit or digital meter
- Water‑proof marker for labeling pods
- Scissors for pruning and harvest
Step 1: Choose a Hydroponic System
Selecting the right system sets the foundation for a reliable tasting flight. For beginners who value simplicity and affordability, the Ahopegarden 10-Pod Hydroponic Garden provides a compact, all‑in‑one solution. It includes a 3‑liter water reservoir, an adjustable LED grow light, and a water‑level window. Priced at $65.99 with a 4.6‑star rating from over 3,000 reviewers, it offers high planting efficiency and two light modes (vegetable‑blue and fruit‑red) that accelerate growth.
If you require more pods or a touchscreen interface, the Ahopegarden 12-Pod Hydroponic Garden expands capacity to 12 pods and adds an LCD control panel for precise timing. At $69.99 and a 4.6‑star rating, it delivers adjustable height, quiet water circulation, and a 5‑liter tank—ideal for larger tasting flights.
For a budget‑friendly option with a detachable light pole, consider the URUQ 8-Pod Hydroponic Garden. Its 24‑watt LED and ultra‑quiet pump make it suitable for kitchens where noise matters. Priced at $49.99 with a 4.5‑star rating, it still supports eight simultaneous herbs.
Advanced users who desire app‑controlled lighting and Wi‑Fi monitoring may prefer the LetPot LPH‑Air Smart Hydroponic Garden. At $62.49 and a 4.6‑star rating, it offers a 4‑liter tank, 24W full‑spectrum LED, and a smartphone app that alerts for low water, adjusts brightness, and logs growth data.
Step 2: Prepare the Growing Media
All recommended systems ship with sponge plugs or coconut coir cones. Insert each plug into a pod, ensuring it sits snugly to prevent water loss. The sponge retains moisture while allowing oxygen to reach the roots, a key advantage over soil that can become compacted. If you prefer a reusable medium, purchase additional sponge plugs—most are food‑grade and BPA‑free.
Step 3: Select and Label Your Herbs
Choose a diverse set of herbs that complement each other in flavor. A classic tasting flight includes:
- Basil – sweet, aromatic, perfect for tomatoes
- Mint – cooling, ideal for drinks and desserts
- Parsley – bright, slightly peppery, great for garnish
- Cilantro – citrusy, essential for Asian dishes
- Thyme – earthy, works well with roasted vegetables
Use a waterproof marker to label each pod. Clear labeling prevents cross‑contamination and helps you track germination times.
Step 4: Set Lighting and Timing
Proper lighting drives photosynthesis. The LED panels on the Ahopegarden and LetPot units emit a full‑spectrum light that mimics natural sunlight. For herb growth, a 16‑hour light / 8‑hour dark cycle is optimal. The Ahopegarden 10‑Pod model includes an automatic timer that switches on for 16 hours; the LetPot app lets you fine‑tune the schedule to 24‑hour increments, which is useful if you notice leggy growth.
Adjust the height of the light post so that the LED sits approximately 4‑6 inches above the tops of the seedlings. As the herbs mature, raise the light to maintain a 14‑inch distance, preventing light burn while ensuring sufficient intensity.
Step 5: Plant and Germinate
Place 1‑2 seeds into each sponge plug, then gently press the plug into the pod. Fill the reservoir with water mixed according to the nutrient solution’s instructions—typically 1 ml of concentrate per liter of water. Check the pH; herbs thrive between 5.8 and 6.2.
Close the dome (if provided) to maintain humidity, which accelerates germination. Most herbs sprout within 3‑5 days. Once the first true leaves appear, remove the dome to allow airflow and prevent mold.
Step 6: Harvest and Assemble the Tasting Flight
Harvest herbs by snipping the tops with clean scissors. Cut just above a node to encourage bushier growth. For a tasting flight, arrange small bundles of each herb on a wooden board, label them, and provide a brief description of flavor notes. Serve the flight alongside olive oil, cheese, or a simple vinaigrette to showcase each herb’s character.
Because hydroponic herbs grow faster, you can rotate the flight every two weeks, offering fresh varieties seasonally.
Tips & Pro Tips
- Maintain water temperature between 68‑72°F (20‑22°C) for optimal nutrient uptake.
- Refresh the nutrient solution every two weeks to prevent salt buildup.
- Rotate pods periodically to ensure even light exposure.
- If the system’s timer resets after a power outage (as noted by Ahopegarden users), simply re‑plug and allow the automatic 16‑hour cycle to resume.
- Use a clean, soft brush to remove any algae that may develop on the reservoir walls.
Troubleshooting
| Problem | Possible Cause | Solution |
|---|---|---|
| Seeds not germinating | Incorrect pH or nutrient concentration | Adjust pH to 5.8‑6.2 and dilute nutrient solution. |
| Yellowing leaves | Insufficient light or nutrient deficiency | Raise LED height or add a second dose of nutrients. |
| Pump makes loud noise | Air bubbles in pump line | Bleed the pump by briefly opening the water level window. |
Conclusion
By selecting an appropriate hydroponic system, preparing media, choosing complementary herbs, and managing light and nutrients, one can create a vibrant herb tasting flight that delights the palate and showcases the advantages of indoor hydroponic gardening. The guide provides a repeatable process that yields fresh herbs faster than soil, reduces waste, and adds an elegant culinary element to any gathering.
Products Mentioned in This Guide
Frequently Asked Questions
What is a hydroponic herb tasting flight?
It is a curated collection of fresh herbs grown hydroponically and harvested together for a multi‑herb culinary tasting experience.
Which hydroponic system is best for beginners?
The Ahopegarden 10‑Pod Hydroponic Garden is recommended for its compact, all‑in‑one design and affordable price.
How do I maintain proper pH for herb growth?
Use a pH testing kit or digital meter and adjust the nutrient solution to stay between 5.5 and 6.5 for most herbs.
How long does it take to harvest herbs for a tasting flight?
Most herbs are ready to harvest in 3‑5 weeks after germination when they reach 4‑6 inches tall.
Can I reuse the nutrient solution for multiple harvests?
Yes, replenish the solution with fresh nutrients and adjust pH after each harvest to keep plants healthy.