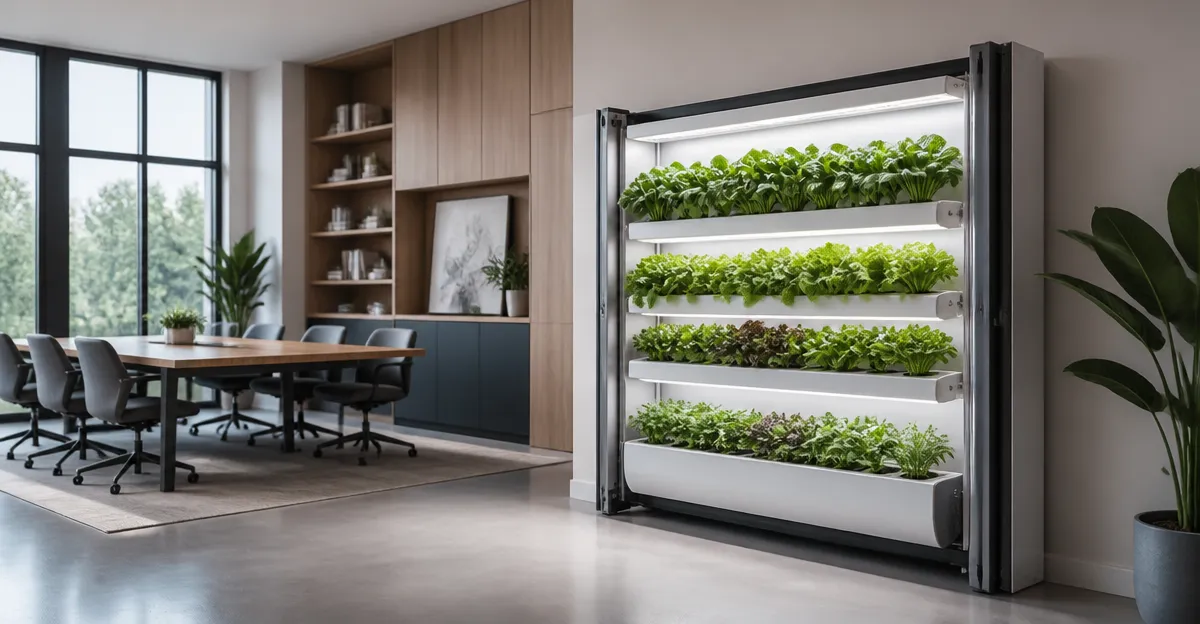
Introduction
Indoor gardening has become an essential skill for modern living, especially when space is at a premium. This guide teaches readers how to construct a foldaway hydroponic system that can be tucked away in a multipurpose room and deployed whenever fresh herbs or vegetables are desired. By following the instructions, one will gain a functional, low‑maintenance garden that maxims yield while minimising footprint, making the solution valuable for apartments, home offices, or shared living areas.
The article covers material selection, structural design, water‑circulation setup, lighting configuration, and final testing. Each step includes practical advice, safety warnings, and optional product recommendations that simplify the build without compromising quality. Whether one is a seasoned grower or a curious beginner, the guide provides enough depth to ensure success.
What You'll Need
- PVC pipe and fittings (31.1‑inch, 2.8‑inch diameter) for a sturdy, foldable frame.
- Water reservoir (5‑7.5 L capacity) with a quiet pump.
- Adjustable full‑spectrum LED grow light.
- Growing pods, sponges, and nutrients for hydroponic cultivation.
- Basic tools: drill, saw, zip ties, and a level.
- Optional smart controllers and apps for automated watering and lighting.
For convenience, the following Amazon products match the requirements and have proven performance in real‑world reviews.
Step 1: Design a Foldable Frame
Begin by measuring the available floor space and determining the maximum width of the system when unfolded. A modular PVC frame offers durability, lightweight construction, and easy disassembly. Cut three lengths of 31.1‑inch PVC pipe for the side rails and three shorter pieces for cross‑supports. Use brass couplings to join the sections, allowing the frame to collapse flat for storage.
The VIVOSUN 108-Plant Hydroponic System provides a ready‑made PVC scaffold that can be repurposed for a custom frame. Its 108 planting sites, three‑layer design, and food‑grade PVC ensure safety and scalability. Priced at $111.99 with a 4/5 rating from 1,349 reviews, it offers a solid foundation without the need to source individual pipes.
Why choose VIVOSUN? The pre‑drilled holes simplify the installation of water lines, and the included timer supports a nutrient‑film technique that can be adapted to a smaller, foldable layout. The system’s modular nature aligns with the goal of a portable garden.
Step 2: Install the Water Reservoir and Pump
Position a water tank beneath the frame so that gravity assists in feeding the nutrient solution to the grow channels. A 5.5‑liter reservoir fits comfortably under a 12‑pod unit, while a 7.5‑liter tank accommodates larger setups. Secure the tank with brackets that allow it to slide out for cleaning.
For a compact, integrated solution, consider the LETPOT 12-Pod Hydroponic Garden. It includes a 5.5 L water tank, a quiet pump, and an automatic timer, all controlled via a smartphone app. At $97.17 and a 4.5/5 rating from 1,774 reviews, the system delivers reliable circulation without additional hardware.
Using LETPOT’s built‑in pump reduces the number of external components, decreasing potential leak points. The app‑driven timer ensures the pump runs for 30‑minute intervals, providing oxygenation while conserving energy.
Step 3: Set Up Adjustable LED Lighting
Plants require a balanced light spectrum for photosynthesis, especially in indoor environments where natural sunlight is limited. Mount an adjustable LED grow light on a sliding rail that can be raised or lowered as plants mature. Position the light 6‑12 inches above the canopy for seedlings, then gradually increase the distance to prevent stretching.
The LETPOT 21-Pod Hydroponic Garden features a 36‑watt full‑spectrum LED with eight brightness levels and a 30‑inch adjustable rod. Priced at $213.29 with a 4.5/5 rating, it offers superior light intensity and flexibility for larger plant varieties such as tomatoes and peppers.
Why opt for the LETPOT 21‑Pod light? Its higher wattage accelerates growth up to three times faster than traditional lighting, and the dual‑mode (blue for vegetative growth, red for flowering) allows precise control over plant development. The smart app also logs lighting schedules, aiding reproducibility.
Step 4: Prepare Growing Media and Pods
Hydroponic systems rely on inert media such as rockwool, coco coir, or pre‑filled sponges to support root anchorage while allowing nutrient flow. Insert the media into the planting cups, then place the cups into the grow deck. Ensure each cup is level to promote even water distribution.
The Ahopegarden 12-Pod Hydroponic Garden includes 12 reusable pods, sponges, and an LCD control panel. At $69.99 with a 4.6/5 rating, it provides a cost‑effective starter kit that integrates seamlessly with the foldable frame. Its adjustable height and dual light modes complement the LED setup described earlier.
Choosing Ahopegarden’s pods reduces the need to purchase separate accessories, and the LCD panel offers a quick visual reference for power status, which is handy when the system is stored away.
Step 5: Connect the Nutrient Delivery System
Mix a balanced hydroponic nutrient solution according to the manufacturer’s instructions, typically using a 1‑2 ml per liter ratio for leafy greens. Fill the reservoir, then attach the tubing from the pump outlet to the inlet of each grow channel. Use zip ties to secure the tubing and prevent kinks.
If additional flow control is desired, the URUQ 8-Pod Hydroponic Garden offers a detachable, height‑adjustable LED pole and a 3‑liter water tank with a quiet pump that cycles every 30 minutes. Priced at $45.99 with a 4.5/5 rating, it serves as an excellent supplemental pump and lighting module for smaller sections of the system.
The URUQ unit’s low‑decibel pump (under 20 dB) ensures a quiet environment, making it suitable for bedrooms or office spaces where noise could be disruptive.
Step 6: Program the Smart App and Test the System
Download the LetPot app (available for iOS and Android) and pair it with the LED light and pump modules. Set a 16‑hour light cycle for vegetative growth, then switch to an 8‑hour dark period to mimic natural day‑night rhythms. Configure the water‑level sensor alerts to receive notifications when the reservoir falls below the recommended threshold.
During the initial test, run the pump for a full cycle while observing water flow through each channel. Check for leaks, ensure the LED light is evenly distributed, and verify that the nutrient solution reaches all pods. Adjust the light height and pump timing as needed based on plant response.
By leveraging the integrated app features of the LETPOT systems, one gains remote control, automatic OTA firmware updates, and a plant diary that records growth milestones. This data-driven approach improves consistency across multiple growing cycles.
Tips & Pro Tips
- Invest in a low‑cost pH/EC meter (approximately $15‑$20) to monitor nutrient solution balance; most reviews highlight its importance for fruiting plants.
- Use black duct tape or 3D‑printed plugs to seal unused pod holes; this prevents algae growth caused by stray light.
- When folding the frame for storage, detach the LED pole and pump tubing to avoid strain on connectors.
- Rotate crops every 4‑6 weeks to prevent nutrient depletion and to maintain soil‑free disease resistance.
- For larger yields, apply the “rule of 3” – allocate one plant per three pods for fruiting varieties such as tomatoes or peppers.
Troubleshooting
| Problem | Possible Cause | Solution |
|---|---|---|
| Pump does not activate | Loose power connection or clogged inlet | Check the power cord, reseat the plug, and flush the inlet with clean water. |
| Leaves turning yellow | Nutrient imbalance or low pH | Measure pH (target 5.8‑6.2) and adjust nutrient concentration accordingly. |
| Algae growth on the deck | Excess light on unused holes | Seal holes with opaque tape or plugs; reduce ambient light exposure. |
| Water level sensor false alarm | Air bubbles in the sensor tube | Bleed air by briefly running the pump and tapping the sensor housing. |
Conclusion
By following this step‑by‑step guide, one can assemble a versatile, foldaway hydroponic system that fits neatly into any multipurpose room. The combination of a sturdy PVC frame, reliable water circulation, adjustable full‑spectrum lighting, and smart app control creates an efficient growing environment that maximizes yield while minimizing space usage. Readers are encouraged to experiment with different crops, refine lighting schedules, and enjoy the therapeutic benefits of indoor gardening.
Whether one opts for the premium LETPOT 21‑Pod setup or a budget‑friendly URUQ 8‑Pod module, the principles outlined remain applicable. Embrace the flexibility of the design, and watch fresh produce flourish year‑round.
Products Mentioned in This Guide
Frequently Asked Questions
What materials are best for building a foldaway hydroponic frame?
PVC pipe and compatible fittings (31.1‑inch length, 2.8‑inch diameter) provide a lightweight, sturdy, and easily collapsible structure.
How large should the water reservoir be for a small indoor hydroponic system?
A 5‑7.5 L reservoir is sufficient for a compact setup, offering enough volume for nutrient circulation without taking up excess space.
Can I use any LED grow light for the foldaway system?
Choose an adjustable full‑spectrum LED light so you can set the height and intensity to match the plants’ growth stage.
What safety precautions should I follow when assembling the pump?
Ensure the pump is rated for quiet operation, secure all connections to prevent leaks, and keep electrical components away from water sources.
How do I maintain the system to prevent algae growth?
Regularly change the nutrient solution, clean the reservoir and tubing, and keep the grow light on a timer to limit excess light exposure.