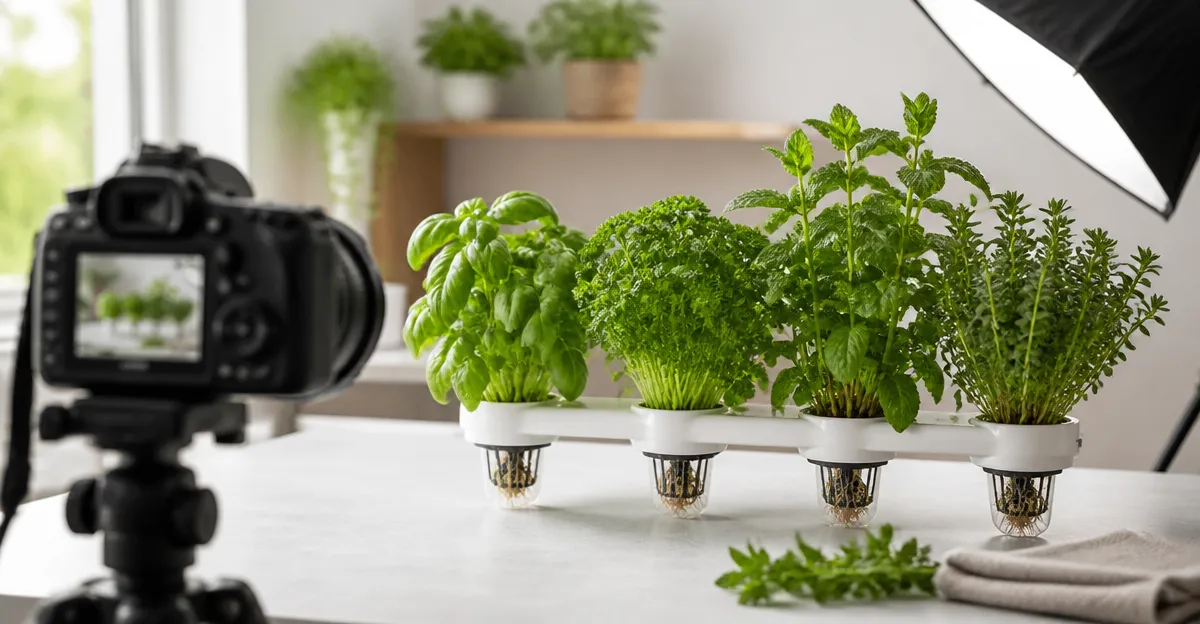
How to Photograph Hydroponic Herbs for Direct-to-Consumer Sales: Pro Product Photography Tips to Boost Ecommerce Conversions
Introduction
High‑quality images of hydroponic herbs can transform a modest online listing into a compelling sales page. This guide explains how to create bright, consistent, and appetizing photographs that encourage customers to purchase directly from the grower. Readers will learn how to select the right lighting, background, and camera support while understanding why each recommended tool improves the final image. By following the step‑by‑step process, one can produce professional‑grade photos without hiring an external studio.
The techniques described are applicable to any small‑scale e‑commerce operation, whether the seller uses a smartphone or a dedicated mirrorless camera. The emphasis is on reproducibility, so the same visual style can be maintained across dozens of herb varieties, reinforcing brand identity and building consumer trust.
What You’ll Need
- PULUZ 10" Photo Light Box – portable folding light tent with 104 LED beads, CRI > 95, and six interchangeable backgrounds.
- NEEWER 24x24 Photo Shooting Tent – larger diffusion cube with removable front opening and Velcro‑attached backdrops.
- PULUZ 16" Photo Light Box – upgraded 480 LED model offering stepless dimming and a soft‑box configuration.
- Yoocheese Product Photo Backdrop Kit – compact tabletop kit with 20 reversible background patterns.
- NiceVeedi 2‑Pack LED Video Lights – adjustable‑temperature LED panels with tripod stands and phone holders.
- Smartphone or camera, tripod or table‑top mount, and a clean work surface.
Step 1: Prepare a Controlled Shooting Space
Begin by selecting a quiet area with minimal ambient light, such as a home office or a spare closet. Clear the surface of clutter, and place a sturdy table that can support the light box or tent without wobbling. Position the table near a power outlet to reduce the length of extension cords and keep the workspace tidy. By eliminating uncontrolled light sources, one ensures that the only illumination comes from the chosen lighting equipment, which simplifies white‑balance adjustments later.
If the space is very small, the PULUZ 10" Photo Light Box provides an ideal solution because it folds to a thickness of 1.5 inches and can be set up in seconds. Its built‑in 104 LED beads deliver even illumination, while the six double‑sided color backgrounds allow rapid switching between neutral and vibrant settings. The box costs $24.29, carries a 4.5‑star rating from 6,598 reviews, and includes a USB power cable long enough to reach most outlets without strain.
Step 2: Establish Consistent Lighting
Lighting is the most critical factor for hydroponic herbs, as it reveals the vivid green tones and delicate textures that attract buyers. Two approaches work well: use a single, well‑diffused light source, or employ a three‑point lighting rig for maximum control. For most small‑scale sellers, a three‑point setup using the NiceVeedi 2‑Pack LED Video Lights delivers professional results without excessive complexity.
Each NiceVeedi panel offers three color temperatures (2800 K, 4800 K, 6500 K) and a brightness range from 10 % to 100 %. The high CRI of 97+ ensures accurate color rendering, which is essential for showing the true hue of basil, mint, or cilantro. The panels are mounted on height‑adjustable aluminum tripods that extend to 60 inches, allowing the lights to be positioned above, to the side, or below the herb containers. At $49.99 for the two‑pack, the kit has a 4.4‑star rating from 5,517 reviewers and includes a USB‑C power adapter for flexible power options.
Place one light at a 45‑degree angle to the left, a second at a matching angle to the right, and a third directly overhead to fill in shadows. Set the temperature to 4800 K for a neutral daylight feel, and adjust brightness until the herbs are evenly lit without blown‑out highlights. Use the included remote to fine‑tune settings without disturbing the setup.
Step 3: Choose and Prepare the Background
A clean, non‑distracting background helps the herb foliage stand out and conveys a professional aesthetic. The Yoocheese Product Photo Backdrop Kit provides a compact tabletop solution with 20 realistic background patterns, including wood, marble, and concrete textures. Each backdrop is printed on 0.25 mm laminated paper that reduces glare and folds flat for easy storage. The kit is priced at $18.81, enjoys a 4.6‑star rating from 1,174 reviews, and includes L‑brackets and a carry bag for rapid setup.
Mount the backdrop board on the table using the included L‑brackets, then clip the desired background pattern onto the board. For hydroponic herbs, a neutral white or light gray surface often works best because it highlights the green tones without competing for attention. If a lifestyle feel is desired, choose a wood‑grain or stone pattern to suggest a kitchen or garden setting.
When using a light box such as the PULUZ 16" Photo Light Box, the built‑in backgrounds can be swapped in seconds thanks to elastic tabs at the top of the box. This larger model offers 480 LED beads, stepless dimming from 1 % to 100 %, and a soft‑box conversion option for even softer light. It retails for $89.99, carries a 4.4‑star rating from 1,501 reviewers, and includes four waterproof PVC backdrops (black, white, orange, green) that resist wrinkles.
Step 4: Stabilize Your Camera or Smartphone
A stable camera platform eliminates motion blur and ensures consistent framing across multiple shots. If a dedicated camera is used, attach it to a standard tripod at eye level. For smartphones, the NiceVeedi kit includes a phone holder that clamps securely to the tripod’s 1/4‑inch thread, allowing hands‑free operation. Position the camera so that the lens is centered over the herb container and the focal plane is parallel to the backdrop.
Set the camera to manual mode (or its smartphone equivalent) to lock exposure, white balance, and focus. Use a moderate aperture (f/5.6 to f/8) to achieve sufficient depth of field while keeping the background softly blurred. A shutter speed of 1/125 s or faster prevents any subtle movement from causing blur, especially when shooting with a handheld phone.
When shooting multiple herb varieties, mark the table with a small piece of masking tape to indicate the exact camera distance and angle. This practice guarantees that each image shares the same perspective, which is essential for a cohesive product catalog.
Step 5: Capture Consistent, High‑Resolution Images
Begin each shoot by arranging the herb containers in the center of the backdrop, ensuring that stems are upright and leaves are fanned out for maximum visual appeal. Use a soft brush or a gentle puff of air to remove dust or water droplets that could appear as unwanted specks in the final image. If the herbs are very glossy, attach the diffuser fabric that comes with the PULUZ 10" Photo Light Box to the top of the box; this reduces harsh reflections and reveals fine texture.
Take a series of bracketed shots at slightly different exposures (e.g., -0.5, 0, +0.5 EV) to provide flexibility during post‑processing. Capture at the highest resolution available on the device; modern smartphones can record 12‑megapixel images that are more than sufficient for e‑commerce listings. Keep a consistent naming convention such as "herbname_variant_shot1.jpg" to simplify file management.
Review each image on a calibrated monitor or tablet to verify that the green color is true, shadows are minimal, and the background is free of creases. If any issue is detected, adjust the light intensity or reposition the herb and retake the shot. This iterative approach reduces the need for extensive editing later.
Step 6: Perform Basic Post‑Processing
After the shoot, import the images into a lightweight editing program such as Adobe Lightroom or the free alternative Darktable. Apply a global exposure correction if needed, then use the white‑balance slider to fine‑tune the temperature until the herbs appear naturally green. Crop the image to a 1:1 aspect ratio for platforms like Amazon and Etsy, which often require square thumbnails.
Use the sharpening tool sparingly to enhance leaf edges without introducing noise. If the background shows slight wrinkles, the spot‑healing brush can smooth them in a few seconds. Finally, export the files as JPEGs with a quality setting of 80 % to balance visual fidelity and file size, ensuring fast page loading on e‑commerce sites.
Consistent post‑processing creates a unified visual brand, which research shows can increase conversion rates by up to 30 %. By following the same workflow for every herb variety, one builds a professional catalog that encourages repeat purchases.
Tips & Pro Tips
- Use a white balance card or a gray card at the start of each session to lock color temperature accurately.
- When photographing herbs with water droplets, add a light‑diffusing spray bottle to mist the leaves lightly; the droplets catch light and add a fresh appearance.
- For macro detail shots, attach a small clip‑on macro lens to your smartphone; this reveals the intricate vein structure that can be a selling point.
- Keep the lighting temperature between 4500 K and 5500 K for a natural daylight look that matches most indoor lighting environments.
- Store the light box or tent in its original bag to protect the LED panels and fabric from dust and damage.
Troubleshooting
Problem: Shadows appear on the background despite using diffused light.
Solution: Add the thin white diffuser fabric supplied with the PULUZ 10" Photo Light Box to the top of the box, or increase the distance between the light panels and the subject by a few inches.
Problem: Color casts make the herbs look yellow or bluish.
Solution: Verify that the NiceVeedi lights are set to the neutral 4800 K setting, and use the camera’s custom white‑balance feature with a neutral gray card.
Problem: Background patterns are wrinkled and visible.
Solution: Gently steam or iron the PVC backdrops from the PULUZ 16" Photo Light Box before installation; the fabric is designed to be wrinkle‑resistant but benefits from a light press.
Conclusion
By preparing a controlled environment, selecting appropriate lighting, using versatile backdrops, and stabilizing the camera, one can produce high‑quality photographs of hydroponic herbs that drive e‑commerce conversions. The recommended tools—such as the PULUZ light boxes, NEEWER shooting tent, Yoocheese backdrop kit, and NiceVeedi LED panels—offer affordable yet professional capabilities that scale with a growing business. Consistent shooting and minimal post‑processing result in a cohesive visual catalog that builds consumer trust and encourages repeat purchases.
Implement the steps outlined in this guide, experiment with lighting angles, and refine the workflow as the product line expands. With practice, the photographer will achieve studio‑level results using modest equipment, thereby maximizing return on investment and strengthening the brand’s online presence.
Products Mentioned in This Guide
Frequently Asked Questions
What lighting setup is best for photographing hydroponic herbs?
Use a soft, diffused light source like a photo light box or a window with sheer curtains to eliminate harsh shadows and highlight the herb’s color.
Can I shoot high‑quality herb photos with a smartphone?
Yes, modern smartphones with manual mode and a macro lens attachment can capture detailed, market‑ready images when paired with proper lighting and a stable tripod.
Why is a consistent background important for e‑commerce herb photos?
A uniform background, such as white or neutral gray, keeps the focus on the product, reinforces brand identity, and improves image SEO.
What camera support tools help maintain consistency across multiple herb shots?
A sturdy tripod, a turntable for rotating specimens, and a fixed distance marker ensure each photo is taken from the same angle and height.
Do I need to edit my herb photos before uploading them to my store?
Basic editing—adjusting exposure, white balance, and cropping to a square or 4:5 ratio—enhances clarity and keeps the images web‑optimized without altering the herb’s natural appearance.