Introduction
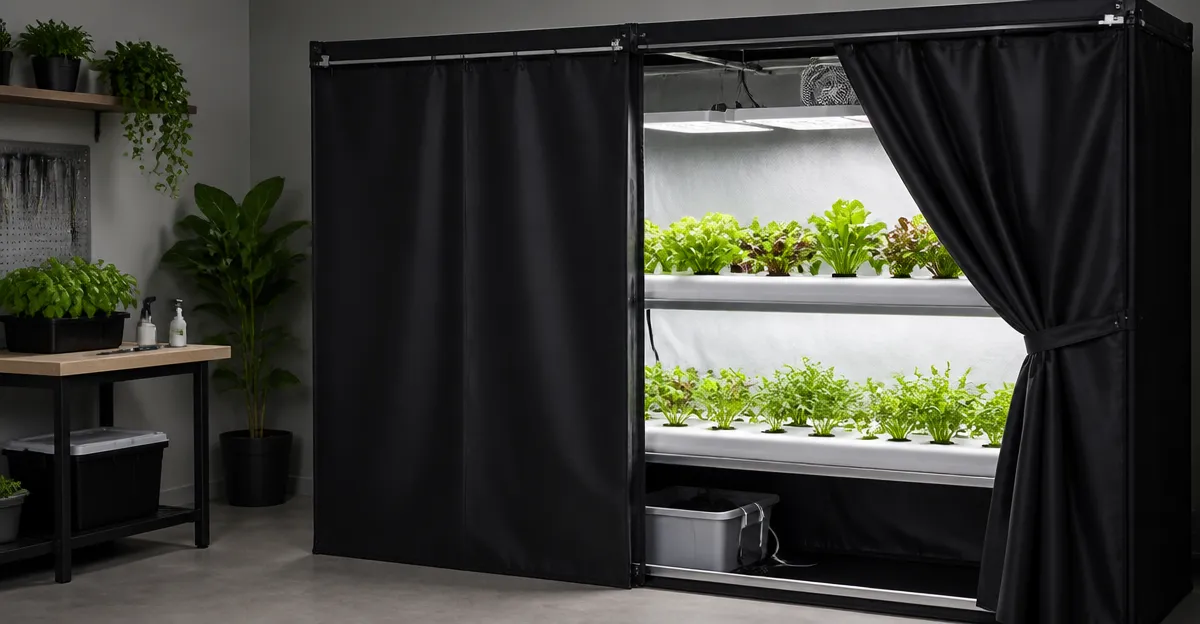
Indoor hydroponic growers require precise control over ambient light to maximize photosynthetic efficiency and prevent unwanted photoperiod disruptions. This guide explains how to install integrated blackout curtains that block 85‑99% of external light, reduce temperature fluctuations and create a consistent environment for higher yields. Readers will learn measurement techniques, mounting methods, sealing strategies and maintenance practices that apply to any size grow room. By following the steps, growers can achieve total light control without compromising aesthetic appeal or structural integrity.
What You'll Need
- Two panels of NICETOWN Blackout Curtains (42"×63" each, 4.6★ rating, $9.98 per set).
- Two panels of LEMOMO Blackout Curtains (52"×84" each, 4.6★ rating, $14.58 per set) for larger windows.
- Two panels of ChrisDowa Blackout Curtains (42"×63" each, 4.6★ rating, $11.69 per set) as an alternative budget option.
- Two panels of MIULEE Linen Blackout Curtains (52"×84" each, 4.6★ rating, $24.95 per set) for a premium linen look.
- Optional: NICETOWN Blackout Curtain Blinds (42"×63" each, 4.6★ rating, $11.99 per set) for rod‑pocket installation.
- Standard curtain rod (diameter 1–2 inches), measuring tape, level, drill, screws, and fabric‑friendly adhesive tape.
- Thermal insulation strips and weather‑proof sealing tape to eliminate light leaks around edges.
Step 1: Measure the Window and Determine Curtain Size
Accurate measurement is the foundation of an effective blackout system. Measure the width of the window opening from inside edge to inside edge, then add 10–15% to allow for overlap that prevents light seepage. Measure the height from the top of the frame to the floor or desired sill level, adding up to 3 inches if a rod‑pocket style is used to accommodate the curtain’s thickness. For most residential grow rooms, a 42"×63" panel such as NICETOWN Blackout Curtains provides sufficient coverage, while larger windows benefit from the 52"×84" dimensions of LEMOMO Blackout Curtains. Record each measurement in a notebook to avoid errors during the purchasing phase.
Step 2: Choose the Appropriate Curtain Type
The selected curtain must balance light blocking, thermal insulation and ease of installation. NICETOWN Blackout Curtains employ a triple‑weave technology that blocks up to 99% of light, reduces UV exposure and provides moderate thermal regulation, making them ideal for growers who need both darkness and temperature stability. MIULEE Linen Blackout Curtains use a premium faux‑linen fabric and a triple‑weave construction that offers 100% blackout and superior insulation, suitable for high‑value crops. ChrisDowa Blackout Curtains provide a cost‑effective alternative with 98% light blockage and a soft, odor‑free fabric that is safe for nursery environments. Compare price, size and aesthetic preferences before finalizing the purchase.
Step 3: Install the Curtain Rod
Secure a sturdy curtain rod that can support the weight of the selected panels. Use a level to align the rod brackets at a height that allows the curtains to cover the entire window and overlap the surrounding frame by at least two inches on each side. For rod‑pocket curtains such as NICETOWN Blackout Curtain Blinds, ensure the rod diameter does not exceed 2 inches, as the pocket is designed for that range. Fasten the brackets with screws into wall studs to prevent sagging under the heavy polyester or linen material. Once the rod is mounted, slide the curtain panels onto the rod to verify clearance.
Step 4: Hang the Curtains and Adjust Overlap
Hang each panel by threading the grommets onto the rod, ensuring that the decorative side faces outward and the blackout side faces the interior of the grow room. Align the panels so that they overlap by at least 4 inches in the center; this overlap eliminates any potential light gaps that could affect plant photoperiods. For larger windows, use two sets of curtains (e.g., one set of LEMOMO Blackout Curtains on each side) to achieve a seamless seal. Adjust the height by raising or lowering the rod slightly until the bottom of the curtains rests just above the floor or the grow table, allowing easy cleaning underneath.
Step 5: Seal the Perimeter to Prevent Light Leaks
Even with high‑quality blackout fabric, light can infiltrate through gaps around the window frame. Apply thermal insulation strips along the top and sides of the window, pressing them firmly against the wall to create a continuous barrier. Use light‑blocking adhesive tape to seal the bottom edge of the curtains to the floor, especially in rooms with raised flooring or concrete slabs. The combination of triple‑weave curtains and sealed edges reduces stray light to less than 1%, which is critical for maintaining consistent photoperiods for sensitive crops such as lettuce, basil and cannabis.
Step 6: Test Light Levels and Adjust
After installation, use a lux meter to measure the light intensity inside the grow space at plant canopy height. Ideal darkness for night cycles is below 5 lux; if measurements exceed this threshold, check for gaps at the corners and reinforce sealing tape. Adjust the curtain overlap or add an extra layer of a second panel if necessary. Document the final lux readings to establish a baseline for future troubleshooting.
Step 7: Maintain the Curtains for Longevity
Regular maintenance ensures that the blackout performance does not degrade over time. Follow the manufacturer’s care instructions: machine wash NICETOWN Blackout Curtains in cold water, tumble dry low, and iron on a low setting if wrinkles appear. LEMOMO Blackout Curtains should be washed without bleach and iron at low temperature. Inspect the grommets and rod connections monthly; tighten any loose screws to prevent sagging that could create light leaks. Replace curtains that show thinning or loss of blackout capability to maintain optimal growing conditions.
Tips & Pro Tips
- Double the width of the window when ordering curtains to ensure full coverage and overlap; this practice is recommended by many experienced growers.
- Choose darker-colored curtains for maximum light absorption; black or charcoal shades such as those offered by ChrisDowa Blackout Curtains perform better than lighter hues.
- Integrate a motorized curtain track if frequent light‑on/light‑off cycles are required; this can be retrofitted to the existing rod.
- Combine blackout curtains with reflective Mylar panels on the opposite wall to improve light distribution during the photoperiod.
- Monitor temperature fluctuations after installation; the triple‑weave fabric of MIULEE Linen Blackout Curtains can reduce heating costs by up to 15% in extreme climates.
Troubleshooting
Problem: Light still penetrates around the edges.
Solution: Verify that the insulation strips are flush with the wall and that the sealing tape adheres firmly. Replace any worn grommets that may have stretched.
Problem: Curtains sag after several weeks.
Solution: Re‑tighten the rod brackets and consider using a heavier‑duty rod, especially when using the heavier linen‑blend of MIULEE Linen Blackout Curtains. Adding a second rod behind the first can distribute weight evenly.
Conclusion
By following this step‑by‑step guide, indoor hydroponic growers can achieve total light control, improve thermal stability and ultimately increase crop yields. The recommended blackout curtains provide reliable light blockage, energy‑saving benefits and easy maintenance, allowing growers to focus on plant health rather than environmental inconsistencies. Implementing proper measurement, installation and sealing techniques ensures that the grow room remains a dark, stable sanctuary for photosynthetic optimization.
Products Mentioned in This Guide
Frequently Asked Questions
How do I measure my grow room windows for blackout curtain installation?
Measure the width and height of each window opening, then add 2‑4 inches to each dimension for overlap and proper sealing.
Can I install blackout curtains without drilling into the grow room walls?
Yes, use tension rods or adhesive mounting strips designed for indoor use to avoid permanent holes.
What is the ideal mounting height for blackout curtains to prevent light leaks?
Mount the curtain rod or track 2‑3 inches above the window frame and ensure the curtains extend at least 2 inches beyond the sides.
How do I seal gaps around blackout curtains to maintain temperature stability?
Apply weather‑strip tape or magnetic strips along the curtain edges and use blackout fabric clips to press the fabric against the wall.
How often should I clean integrated blackout curtains in a hydroponic setup?
Vacuum or gently brush them monthly and spot‑clean with a mild detergent if they become dusty or stained.